Python rabbitMQ如何實現(xiàn)生產(chǎn)消費者模式
(一)安裝一個消息中間件,如:rabbitMQ
(二)生產(chǎn)者
sendmq.py
import pikaimport sysimport time # 遠程rabbitmq服務的配置信息username = ’admin’ # 指定遠程rabbitmq的用戶名密碼pwd = ’admin’ip_addr = ’10.1.7.7’port_num = 5672 # 消息隊列服務的連接和隊列的創(chuàng)建credentials = pika.PlainCredentials(username, pwd)connection = pika.BlockingConnection(pika.ConnectionParameters(ip_addr, port_num, ’/’, credentials))channel = connection.channel()# 創(chuàng)建一個名為balance的隊列,對queue進行durable持久化設為True(持久化第一步)channel.queue_declare(queue=’balance’, durable=True) message_str = ’Hello World!’for i in range(100000000): # n RabbitMQ a message can never be sent directly to the queue, it always needs to go through an exchange. channel.basic_publish( exchange=’’, routing_key=’balance’, # 寫明將消息發(fā)送給隊列balance body=message_str, # 要發(fā)送的消息 properties=pika.BasicProperties(delivery_mode=2, ) # 設置消息持久化(持久化第二步),將要發(fā)送的消息的屬性標記為2,表示該消息要持久化 ) # 向消息隊列發(fā)送一條消息 print(' [%s] Sent ’Hello World!’' % i) # time.sleep(0.2)connection.close() # 關(guān)閉消息隊列服務的連接
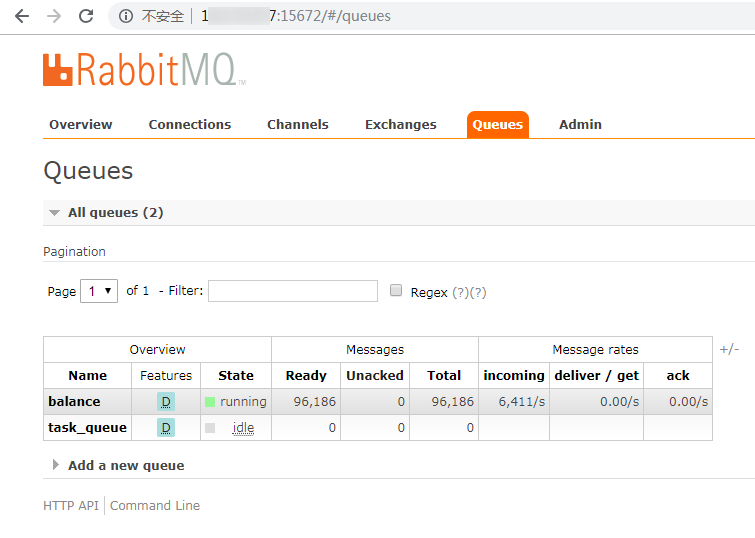
運行sendmq.py文件,可以從以下方法查看隊列中的消息數(shù)量。
一是,rabbitmq的管理界面,如下圖所示:

二是,從服務器端命令查看
rabbitmqctl list_queues

(三)消費者
receivemq.py
import pikaimport sysimport time # 遠程rabbitmq服務的配置信息username = ’admin’ # 指定遠程rabbitmq的用戶名密碼pwd = ’admin’ip_addr = ’10.1.7.7’port_num = 5672 credentials = pika.PlainCredentials(username, pwd)connection = pika.BlockingConnection(pika.ConnectionParameters(ip_addr, port_num, ’/’, credentials))channel = connection.channel() # 消費成功的回調(diào)函數(shù)def callback(ch, method, properties, body): print(' [%s] Received %r' % (time.time(), body)) # time.sleep(0.2) # 開始依次消費balance隊列中的消息channel.basic_consume(queue=’balance’, on_message_callback=callback, auto_ack=True) print(’ [*] Waiting for messages. To exit press CTRL+C’)channel.start_consuming() # 啟動消費
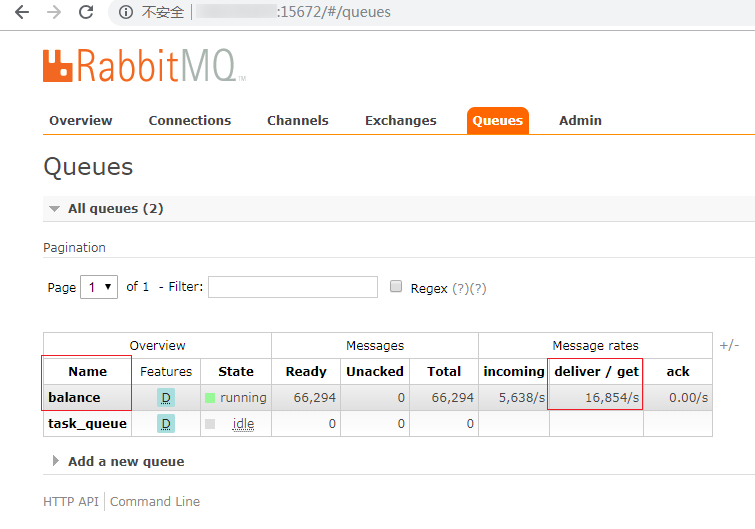
運行receivemq.py文件,可以從以下方法查看隊列中的消息數(shù)量。

或者
rabbitmqctl list_queues
延伸:
systemctl status rabbitmq-server.service # 狀態(tài)systemctl restart rabbitmq-server.service # 重啟
以上就是本文的全部內(nèi)容,希望對大家的學習有所幫助,也希望大家多多支持好吧啦網(wǎng)。
相關(guān)文章:
1. 基于PHP做個圖片防盜鏈2. ASP.NET MVC使用Boostrap實現(xiàn)產(chǎn)品展示、查詢、排序、分頁3. .NET中實現(xiàn)對象數(shù)據(jù)映射示例詳解4. jscript與vbscript 操作XML元素屬性的代碼5. asp.net core 認證和授權(quán)實例詳解6. php使用正則驗證密碼字段的復雜強度原理詳細講解 原創(chuàng)7. XML在語音合成中的應用8. 如何使用ASP.NET Core 配置文件9. 基于javaweb+jsp實現(xiàn)企業(yè)車輛管理系統(tǒng)10. ASP.NET MVC把數(shù)據(jù)庫中枚舉項的數(shù)字轉(zhuǎn)換成文字

 網(wǎng)公網(wǎng)安備