Android Studio配合WampServer完成本地Web服務(wù)器訪問的問題
初入Android Studio,在訪問Web服務(wù)器時(shí)遇到的一些問題,特寫此篇記錄一下錯(cuò)誤的解決。
一、WampServer服務(wù)器初入Android Studio,在進(jìn)行Web服務(wù)器的訪問時(shí)要用到本地的Web服務(wù)器,通過WampServer實(shí)現(xiàn)。本次使用的是WampServer 2.2版本,下載鏈接附在下方:
鏈接: https://pan.baidu.com/s/1STRuXrol0ZXCFkMTpmSOZw 提取碼: 5x22(有32位以及64位兩個(gè)版本)
二、問題解析1.圖標(biāo)橙色安裝后右下角圖標(biāo)為橙色,正常運(yùn)行應(yīng)為綠色。由于WampServer自帶MySQL,而本機(jī)上裝有其他版本的MySQL,導(dǎo)致沖突。解決方法:在環(huán)境配置中根據(jù)安裝目錄(我這里安裝目錄是E:wamp)重新配置MySQL環(huán)境變量,如下圖:
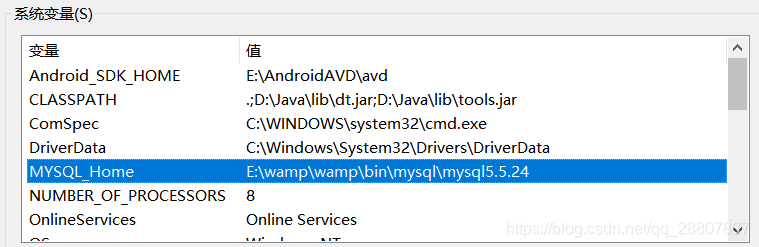
在系統(tǒng)變量path中加入

最后在WampServer運(yùn)行圖標(biāo)單擊,重新啟動(dòng)所有服務(wù)。服務(wù)器在線,變成綠色。另外,在WampSever中單擊圖標(biāo)點(diǎn)擊localhost,若能成功從瀏覽器進(jìn)入頁面則說明服務(wù)器沒有問題。

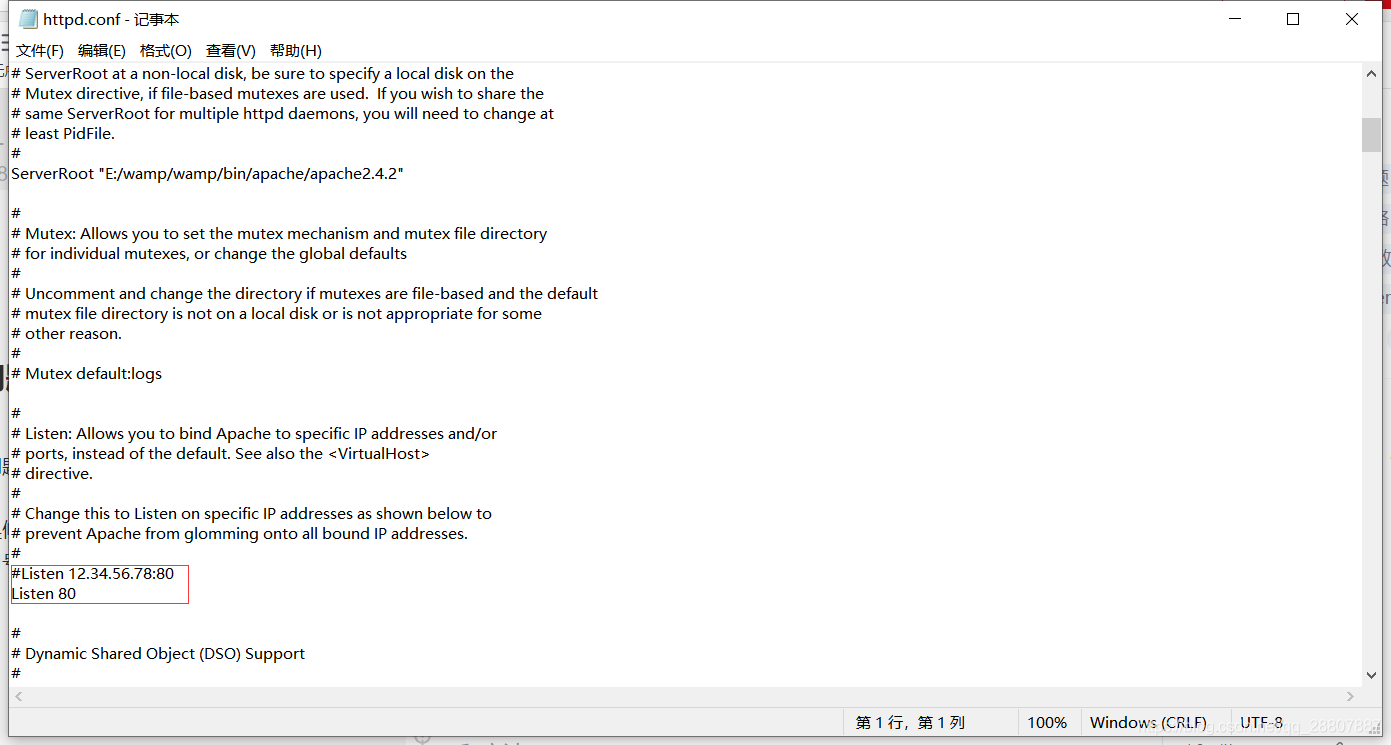
在初期出現(xiàn)問題時(shí),查詢服務(wù)器橙色的原因大多結(jié)果都是修改Apache/http.conf中的端口,但是不改變端口使用原本的80端口也可以成功使服務(wù)器順利啟動(dòng)。因此如果修改了MySQL的問題后服務(wù)器正常后不必修改端口號(hào)。但是要記住這個(gè)端口號(hào),在Android Studio編程中會(huì)用到。
<?xml version='1.0' encoding='utf-8'?><LinearLayout xmlns:android='http://schemas.android.com/apk/res/android' android:layout_width='match_parent' android:layout_height='match_parent' android:orientation='vertical'> <Button android: android:layout_width='wrap_content' android:layout_height='wrap_content' android:text='連接Web服務(wù)器' android:layout_gravity='center'/> <EditText android: android:layout_width='250dp' android:layout_height='50dp' android:layout_gravity='center' /> <EditText android: android:layout_width='250dp' android:layout_height='50dp' android:layout_gravity='center'/> <ImageView android: android:layout_width='wrap_content' android:layout_height='wrap_content' /></LinearLayout>
顯示效果如下:

2、Java代碼:
package com.test.web_server;import android.app.Activity;import android.app.Notification;import android.graphics.Bitmap;import android.graphics.BitmapFactory;import android.os.Bundle;import android.os.Handler;import android.os.Message;import android.os.StrictMode;import android.view.View;import android.widget.Button;import android.widget.EditText;import android.widget.ImageView;import java.io.InputStream;import java.net.HttpURLConnection;import java.net.URL;public class MainActivity extends Activity { Button btn; EditText txt1,txt2; ImageView img; HttpURLConnection conn = null; InputStream inStream = null; String str = 'http://(這里填寫本機(jī)的IP地址):80/test/yinghua.jpg'; //使用Web網(wǎng)站IP(本地IP+port訪問,并非localhost),test文件夾為www下創(chuàng)建 HHandler mHandler = new HHandler(); @Override protected void onCreate(Bundle savedInstanceState) { super.onCreate(savedInstanceState); setContentView(R.layout.activity_main2); img = (ImageView)findViewById(R.id.imageview); txt1 = (EditText)findViewById(R.id.edittext1); txt2 = (EditText)findViewById(R.id.edittext2); btn = (Button)findViewById(R.id.btn); btn.setOnClickListener(new mClick()); } class mClick implements View.OnClickListener { public void onClick(View arg0) { StrictMode.setThreadPolicy( new StrictMode .ThreadPolicy .Builder() .detectDiskReads() .detectDiskWrites() .detectNetwork() .penaltyLog() .build()); StrictMode.setVmPolicy( new StrictMode .VmPolicy .Builder() .detectLeakedSqlLiteObjects() .detectLeakedClosableObjects() .penaltyLog() .penaltyDeath() .build()); getPicture(); } } private void getPicture(){ try{ URL url = new URL(str); //構(gòu)建圖片的URL地址 conn = (HttpURLConnection) url.openConnection(); conn.setConnectTimeout(5000); //設(shè)置超時(shí)時(shí)間,5000毫秒即為5秒 conn.setRequestMethod('GET'); //設(shè)置獲取圖片的方式為GET if(conn.getResponseCode()==200) //響應(yīng)碼為200則為訪問成功 { //獲取連接的輸入流,這個(gè)輸入流就是圖片的輸入流 inStream = conn.getInputStream(); Bitmap bmp = BitmapFactory.decodeStream(inStream); //由于不是msg,因此不能使用sendMessage(msg)方法 mHandler.obtainMessage(0,bmp).sendToTarget(); //向Handler發(fā)送消息,更新UI int result = inStream.read(); while(result != -1){ txt1.setText((char)result); result = inStream.read(); } //關(guān)閉輸入流 inStream.close(); txt1.setText('(1)建立輸入流成功!'); } }catch (Exception e2){txt1.setText('(3)IO流失敗');} } //gitPicture()結(jié)束 /** Android利用Handler來實(shí)現(xiàn)UI線程的更新。 Handler是Android中的消息發(fā)送器,主要接受子線程發(fā)送的數(shù)據(jù),并用此數(shù)據(jù)配合主線程更新UI 接受消息,處理消息,此Handler會(huì)與當(dāng)前主線程一塊運(yùn)行 */ class HHandler extends Handler { //子類必須重寫此方法,接受數(shù)據(jù) public void handleMessage(Message msg){ super.handleMessage(msg); txt2.setText('(2)下載圖像成功!'); img.setImageBitmap((Bitmap) msg.obj); //更新UI } }} //主類結(jié)束
最后,在AndroidManifest.xml文件中記得添加以下權(quán)限:
<uses-permission android:name='android.permission.INTERNET'/>
注意:在Java代碼中,str表示W(wǎng)eb服務(wù)器中的文件地址(這里用的是圖片),我們使用模擬器運(yùn)行程序時(shí),不可以直接使用localhost,這樣是訪問不出來網(wǎng)頁的(可以在模擬器瀏覽器中輸入http://127.0.0.1:80/訪問,會(huì)被拒絕),因此需要通過在cmd命令行中輸入ipconfig查找本機(jī)的IP地址,將他寫到Java代碼中,才能順利運(yùn)行!
四、運(yùn)行效果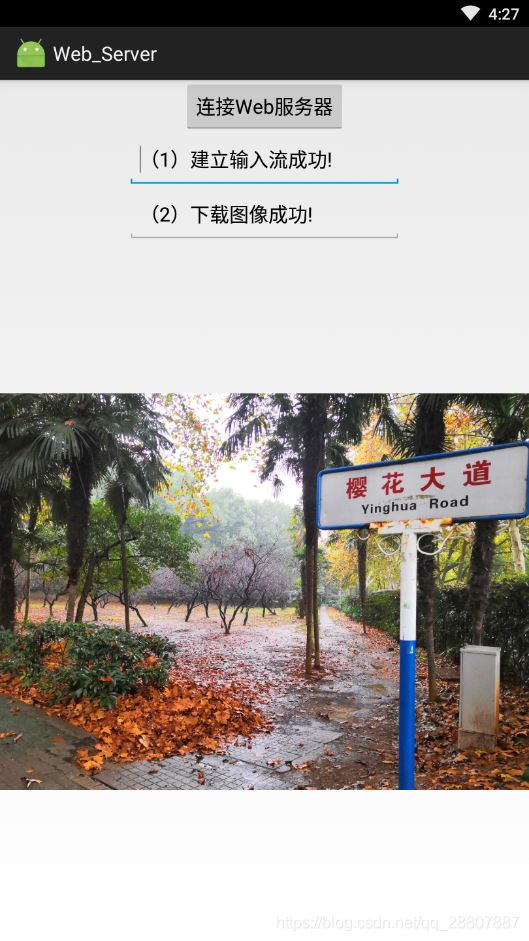
到此這篇關(guān)于Android Studio配合WampServer完成本地Web服務(wù)器訪問的文章就介紹到這了,更多相關(guān)Android Studio訪問本地Web服務(wù)器內(nèi)容請(qǐng)搜索好吧啦網(wǎng)以前的文章或繼續(xù)瀏覽下面的相關(guān)文章希望大家以后多多支持好吧啦網(wǎng)!
相關(guān)文章:
1. python 寫一個(gè)文件分發(fā)小程序2. python調(diào)用百度API實(shí)現(xiàn)人臉識(shí)別3. 如何基于Python和Flask編寫Prometheus監(jiān)控4. Python Selenium破解滑塊驗(yàn)證碼最新版(GEETEST95%以上通過率)5. Python中Anaconda3 安裝gdal庫的方法6. 用python對(duì)oracle進(jìn)行簡單性能測試7. Python自動(dòng)化之定位方法大殺器xpath8. Vue3中使用this的詳細(xì)教程9. Python QT組件庫qtwidgets的使用10. Python 利用flask搭建一個(gè)共享服務(wù)器的步驟
 網(wǎng)公網(wǎng)安備