Spring Security OAuth2 授權碼模式的實現
寫在前邊
在文章OAuth 2.0 概念及授權流程梳理 中我們談到OAuth 2.0的概念與流程,這里我準備分別記一記這幾種授權模式的demo,一方面為自己的最近的學習做個總結,另一方面做下知識輸出,如果文中有錯誤的地方,請評論指正,在此不勝感激
受眾前提
閱讀本文,默認讀者已經過Spring Security有一定的了解,對OAuth2流程有一定了解
本文目標
帶領讀者對Spring Security OAuth2框架的授權碼模式有一個比較直觀的概念,能使用框架搭建授權碼模式授權服務器與資源服務器(分離版本)
授權碼模式流程回顧
授權碼模式要求:用戶登錄并對第三方應用(客戶端)進行授權,出示授權碼交給客戶端,客戶端憑授權碼換取access_token(訪問憑證)
此模式要求授權服務器與用戶直接交互,在此過程中,第三方應用是無法獲取到用戶輸入的密碼等信息的,這個模式也是OAuth 2.0中最安全的一個
Demo基本結構
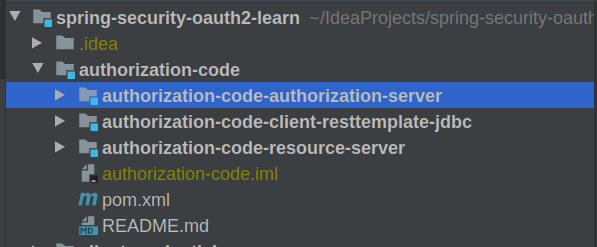
這里主要關注authorization-code-authorization-server與authorization-code-resource-server這兩個模塊
本文以及后續文章的demo均放在GitHub上,歡迎大家Star & Fork,源碼地址:https://github.com/hellxz/spring-security-oauth2-learn
authorization-code-client-resttemplate-jdbc這個項目是用來測試非OAuth2服務使用RestTemplate與JdbcTemplate對接OAuth2授權服務的,流程這里不講,有興趣可以debug看看,可能會讓您對整個流程會有更清晰的感受
Maven依賴
<!--Spring Security--> <dependency> <groupId>org.springframework.boot</groupId> <artifactId>spring-boot-starter-security</artifactId> </dependency> <!--Spring Boot Starter Web 所有demo均使用web--> <dependency> <groupId>org.springframework.boot</groupId> <artifactId>spring-boot-starter-web</artifactId> </dependency> <!-- Spring Security OAuth2 --> <dependency> <groupId>org.springframework.security.oauth</groupId> <artifactId>spring-security-oauth2</artifactId> <version>${spring-security-oauth2.version}</version> </dependency>
搭建授權服務器(Authorization Server)
文中服務器均使用demo級別配置,請勿直接使用到生產環境
授權服務器結構主體如下:
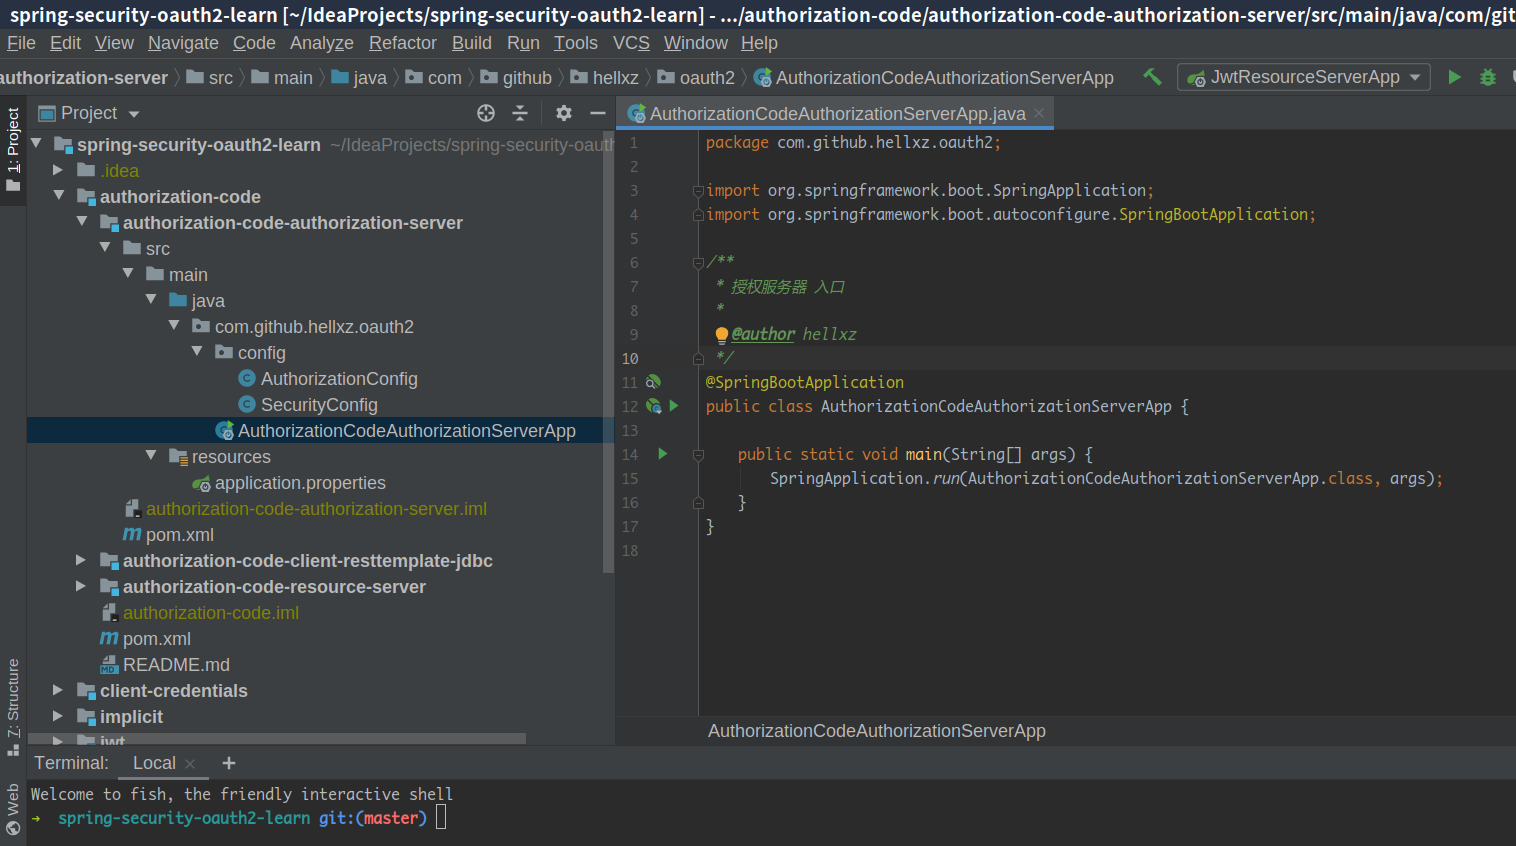
啟動類自不多說,先說下SecurityConfig
package com.github.hellxz.oauth2.config;import org.springframework.context.annotation.Bean;import org.springframework.context.annotation.Configuration;import org.springframework.security.config.annotation.authentication.builders.AuthenticationManagerBuilder;import org.springframework.security.config.annotation.web.builders.HttpSecurity;import org.springframework.security.config.annotation.web.configuration.EnableWebSecurity;import org.springframework.security.config.annotation.web.configuration.WebSecurityConfigurerAdapter;import org.springframework.security.crypto.bcrypt.BCryptPasswordEncoder;import org.springframework.security.crypto.password.PasswordEncoder;import java.util.Collections;@Configuration@EnableWebSecuritypublic class SecurityConfig extends WebSecurityConfigurerAdapter { @Bean public PasswordEncoder passwordEncoder(){ return new BCryptPasswordEncoder(); } @Override protected void configure(AuthenticationManagerBuilder auth) throws Exception { // @formatter: off auth.inMemoryAuthentication() .withUser('hellxz') .password(passwordEncoder().encode('xyz')) .authorities(Collections.emptyList()); // @formatter: on } @Override protected void configure(HttpSecurity http) throws Exception { http.authorizeRequests() .anyRequest().authenticated() //所有請求都需要通過認證 .and() .httpBasic() //Basic登錄 .and() .csrf().disable(); //關跨域保護 }}
通過@Configuration 和@EnableWebSecurity開啟Spring Security配置,繼承WebSecurityConfigurerAdapter的方法,實現個性化配置,這里我們使用內存保存一個名為hellxz、密碼為xyz的用戶,與授權服務器交互的用戶就是他了
除了配置用戶,我們需要對服務的資源進行保護,這里將所有的請求都要求通過認證才可以訪問,用戶登錄需要使用httpBasic形式(就是那種網頁彈個窗要求登錄的那種😄)
Spring Security 5.x版本后,要求顯示聲明使用的密碼器,就是PasswordEncoder了,常用BCryptPasswordEncoder,簡單的可以認為它是使用時間戳和鹽進行加密的一種算法,同一個密碼被加密后也不會相同
接著看看授權服務器的配置,畫重點
package com.github.hellxz.oauth2.config;import org.springframework.beans.factory.annotation.Autowired;import org.springframework.context.annotation.Configuration;import org.springframework.security.crypto.password.PasswordEncoder;import org.springframework.security.oauth2.config.annotation.configurers.ClientDetailsServiceConfigurer;import org.springframework.security.oauth2.config.annotation.web.configuration.AuthorizationServerConfigurerAdapter;import org.springframework.security.oauth2.config.annotation.web.configuration.EnableAuthorizationServer;import org.springframework.security.oauth2.config.annotation.web.configurers.AuthorizationServerSecurityConfigurer;//授權服務器配置@Configuration@EnableAuthorizationServer //開啟授權服務public class AuthorizationConfig extends AuthorizationServerConfigurerAdapter { @Autowired private PasswordEncoder passwordEncoder; @Override public void configure(AuthorizationServerSecurityConfigurer security) throws Exception { //允許表單提交 security.allowFormAuthenticationForClients() .checkTokenAccess('isAuthenticated()'); } @Override public void configure(ClientDetailsServiceConfigurer clients) throws Exception { // @formatter: off clients.inMemory() .withClient('client-a') //client端唯一標識 .secret(passwordEncoder.encode('client-a-secret')) //客戶端的密碼,這里的密碼應該是加密后的 .authorizedGrantTypes('authorization_code') //授權模式標識 .scopes('read_user_info') //作用域 .resourceIds('resource1') //資源id .redirectUris('http://localhost:9001/callback'); //回調地址 // @formatter: on }}
1.通過@Configuration 和EnableAuthorizationServer開啟授權服務器配置,通過重寫AuthorizationServerConfigurerAdapter的方法來完成自定義授權服務器
2.OAuth2授權碼模式中,要求不僅僅用戶需要登錄,還要求客戶端也需要登錄,這里就需要在configure(ClientDetailsServiceConfigurer clients)這個方法中配置客戶端(第三方應用)的登錄信息,
withClient中配置的是客戶端id(client_id)secret為客戶端的密碼,要求使用加密器進行加密授權碼的authorizedGrantTypes必須配置有'authorization_code'(授權碼模式),這里是可以同時支持多種授權模式的,為了簡單只寫一個scopes,請求資源作用域,用于限制客戶端與用戶無法訪問沒有作用域的資源resourceIds,可選,資源id,可以對應一個資源服務器,個人理解為某個資源服務器的所有資源標識redirectUris,回調地址,有兩個作用:1.回調客戶端地址,返回授權碼; 2.校驗是否是同一個客戶端
redirectUris校驗是否同一個客戶端這個,可能說的不是很準確,說下大體流程,我們在授權服務器上配置了這個回調地址,授權服務器在用戶授權成功后,返回授權碼的地址就是它,另外我們后續申請token時,也需要傳遞這個回調地址,所以我的理解是校驗是否是同一客戶端發來的第二次請求(換token時)
3.configure(AuthorizationServerSecurityConfigurer security)這里配置資源客戶端(第三方應用)的表單提交權限,類似Spring Security配置的permitAll()等權限控制標識,如果不配置,客戶端將無法換取token
4.application.properties
這里我只配置了server.port=8080
這樣我們就配置了相當簡易的授權服務器,啟動測試下

獲取授權碼的流程,一般是由客戶端使用自己的client_id與密碼+response_type=code拼接url,讓瀏覽器跳轉完成的,用戶的登錄與授權過程都需要在瀏覽器中完成,啟動項目后訪問下列url
http://localhost:8080/oauth/authorize?client_id=client-a&client_secret=client-a-secret&response_type=code
登錄用戶/密碼: hellxz/xyz ,選擇Approve表示接受授權,Deny反之,如下動圖所示
最后我們得到了回調地址http://localhost:9001/callback?code=2e6450
這里的code就是授權碼,接下來我們使用授權碼進行換取token
POST請求,http://localhost:8080/oauth/token,參數如圖
BasicAuth:這里填的是客戶端配置的client_id和client_secret的值,相當于curl --user client_id:client_secret,配置后會在Header中添加Authorization:Basic Y2xpZW50LWE6Y2xpZW50LWEtc2VjcmV0,Basic空格 后的是client_id:client_secret具體值被Base64后得到的值
請求參數列表:
code=授權碼 grant_type=authorization_code redirect_uri=回調url ,要與配置處和獲取授權碼處相同 scope=作用域最后我們獲得了授權服務的響應,包含token的json
{ 'access_token': '99435e13-f9fe-438a-a94e-3b00d549b329', //訪問token 'token_type': 'bearer', //token類型,使用時需要拼接在token前并在token前加空格 'expires_in': 43199, //過期時間 'scope': 'read_user_info' //作用域}
在access_token未過期之前,同一個用戶名使用同一個客戶端訪問都會是同一個access_token
授權服務器先放在這里,不要關服,接下來搭建資源服務器
搭建資源服務器(Resource Server)
資源服務器結構
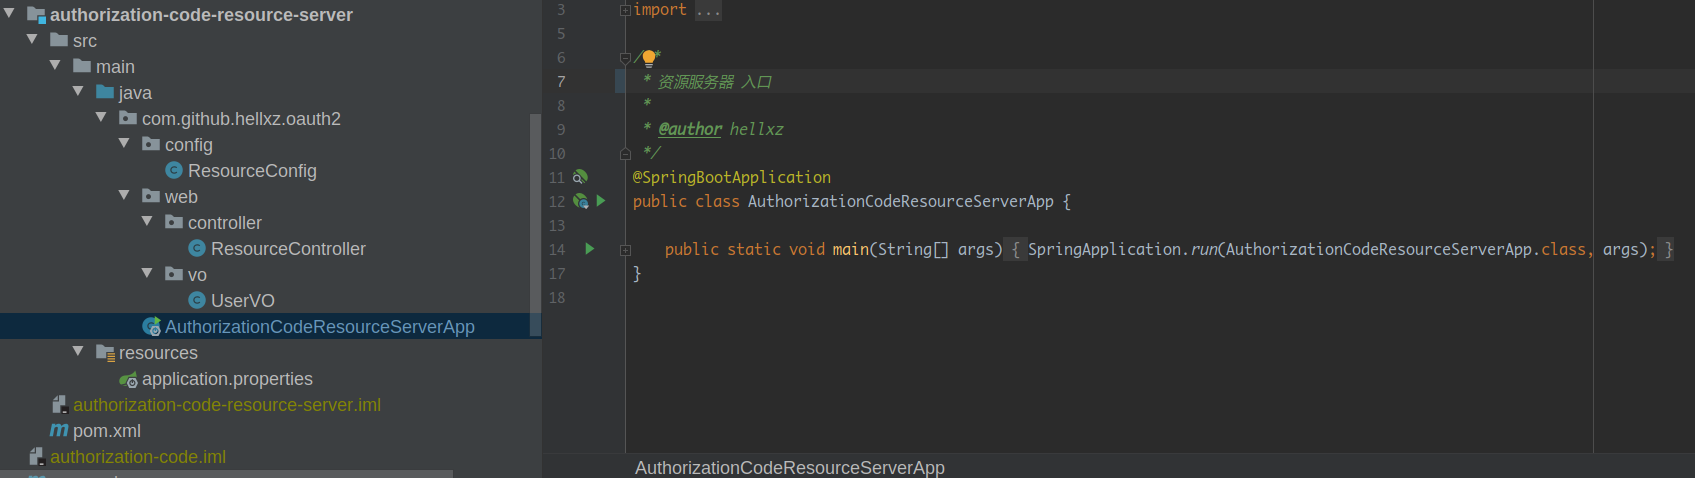
入口類不多說,先搭建資源服務器主要配置,這里直接使用ResourceConfig進行配置
package com.github.hellxz.oauth2.config;import org.springframework.context.annotation.Bean;import org.springframework.context.annotation.Configuration;import org.springframework.context.annotation.Primary;import org.springframework.security.config.annotation.web.builders.HttpSecurity;import org.springframework.security.config.http.SessionCreationPolicy;import org.springframework.security.crypto.bcrypt.BCryptPasswordEncoder;import org.springframework.security.crypto.password.PasswordEncoder;import org.springframework.security.oauth2.config.annotation.web.configuration.EnableResourceServer;import org.springframework.security.oauth2.config.annotation.web.configuration.ResourceServerConfigurerAdapter;import org.springframework.security.oauth2.config.annotation.web.configurers.ResourceServerSecurityConfigurer;import org.springframework.security.oauth2.provider.token.RemoteTokenServices;@Configuration@EnableResourceServerpublic class ResourceConfig extends ResourceServerConfigurerAdapter { @Bean public PasswordEncoder passwordEncoder() { return new BCryptPasswordEncoder(); } @Primary @Bean public RemoteTokenServices remoteTokenServices() { final RemoteTokenServices tokenServices = new RemoteTokenServices(); //設置授權服務器check_token端點完整地址 tokenServices.setCheckTokenEndpointUrl('http://localhost:8080/oauth/check_token'); //設置客戶端id與secret,注意:client_secret值不能使用passwordEncoder加密! tokenServices.setClientId('client-a'); tokenServices.setClientSecret('client-a-secret'); return tokenServices; } @Override public void configure(HttpSecurity http) throws Exception { //設置創建session策略 http.sessionManagement().sessionCreationPolicy(SessionCreationPolicy.IF_REQUIRED); //@formatter:off //所有請求必須授權 http.authorizeRequests() .anyRequest().authenticated(); //@formatter:on } @Override public void configure(ResourceServerSecurityConfigurer resources) { resources.resourceId('resource1').stateless(true); }}
1.通過@Configuration 和@EnableResourceServer這兩個注解標識服務是一個資源服務器,重寫ResourceServerConfigurerAdapter來實現自定義授權服務器
2.配置configure(HttpSecurity http)方法,這里可以代替Spring Security同名方法配置,開啟所有請求需要授權才可訪問
3.配置資源相關設置configure(ResourceServerSecurityConfigurer resources),這里只設置resourceId
后續的使用redis校驗token也在這里設置
4.校驗token的配置,這里使用了遠程調用授權服務器幫忙校驗token的方式,只需要顯示注入RemoteTokenServices remoteTokenServices()的Bean,就可以調用授權服務器的/oauth/check_token端點,設置客戶端配置的值,詳見注釋
這樣一來我們就配置好了資源服務器,當然光有配置是不夠的,我們搞一個資源接口做測試用
上邊的ResourceController與UserVO都比較簡單,傳入一個名稱,返回用戶對象,包含用戶名和郵箱信息
package com.github.hellxz.oauth2.web.controller;import com.github.hellxz.oauth2.web.vo.UserVO;import org.springframework.web.bind.annotation.GetMapping;import org.springframework.web.bind.annotation.PathVariable;import org.springframework.web.bind.annotation.RestController;@RestControllerpublic class ResourceController { @GetMapping('/user/{username}') public UserVO user(@PathVariable String username){ return new UserVO(username, username + '@foxmail.com'); }}
package com.github.hellxz.oauth2.web.vo;public class UserVO { private String username; private String email; public UserVO(String username, String email) { this.username = username; this.email = email; } public String getUsername() { return username; } public void setUsername(String username) { this.username = username; } public String getEmail() { return email; } public void setEmail(String email) { this.email = email; }}
application.properties中配置了與授權服務器不同的端口:8081
server.port=8081
啟動資源服務測試
什么也不傳,直接訪問接口,提示資源需要授權
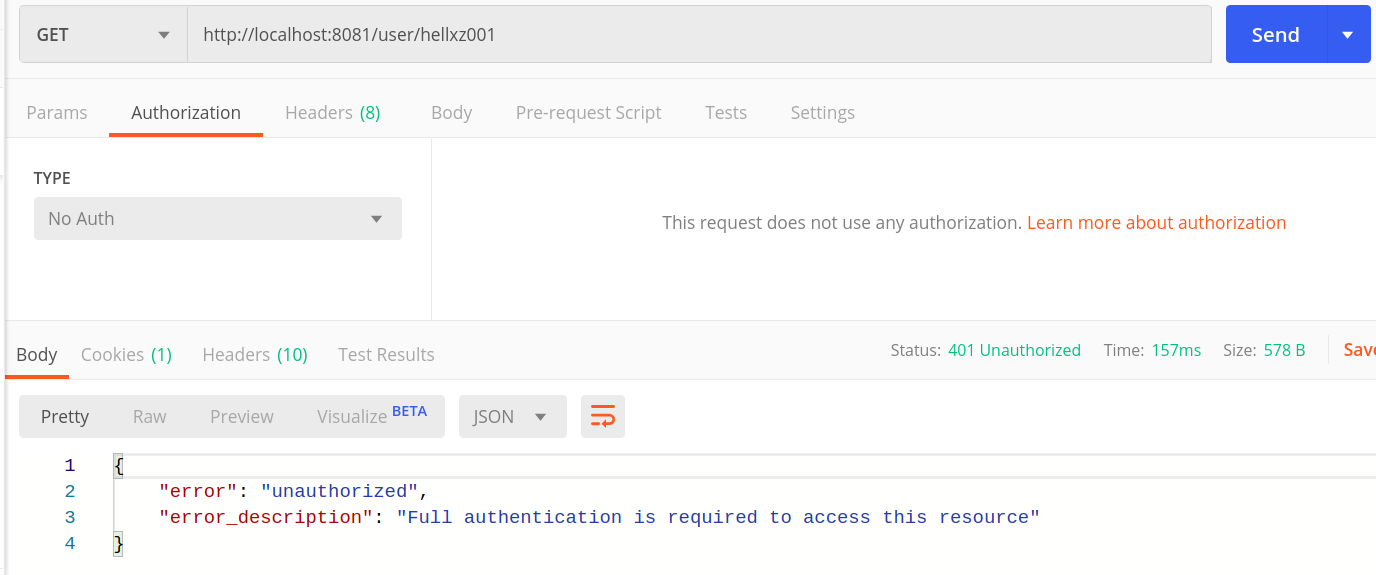
復制之前獲取到的token,添加token訪問接口http://localhost:8081/user/hellxz001
Bearer Token相當于在Headers中添加Authorization:Bearer空格access_token
至此我們成功的搭建并測試了授權碼模式下的最簡單的授權服務與資源服務分離的demo
尾聲
授權碼模式就先在這里告一段落,寫的比較基礎,自認為該說到的點都說到了,后續還會寫其它模式的文章,如文中有何遺漏,請不吝評論反饋,本人會盡快改正,謝謝
本文以及后續文章的demo均放在GitHub上,歡迎大家Star & Fork,源碼地址:https://github.com/hellxz/spring-security-oauth2-learn ,Demo中的README文檔寫得比較詳細,也可堪一看
原文出處https://www.cnblogs.com/hellxz/p/oauth2_oauthcode_pattern.html
到此這篇關于Spring Security OAuth2 授權碼模式的實現的文章就介紹到這了,更多相關Spring Security OAuth2 授權碼模式內容請搜索好吧啦網以前的文章或繼續瀏覽下面的相關文章希望大家以后多多支持好吧啦網!
相關文章:
 網公網安備
網公網安備